Showing posts with label painting. Show all posts

Saturday, August 13, 2011

Our after-nap craft for the day

I think I've created a monster. Every day when Brooke wakes up from her nap she asks what art project we are going to do! I'm a sucker for her blonde hair, blue eyes, and persistence! So.. today I pulled out some odds and ends and the kids decorated little paper people. I was quite impressed with their creations!


Ben would NOT sit down and pose for a picture with his creation. A cat was on our porch. We do not have a cat, so this was a big deal apparently.


CAT!! CAT!!


Saturday, July 23, 2011

Homemade Puffy Paint fun!!

I'd like to formally thank Pinterest for helping me keep me busy, keep my kids happy, and for adding to my never-ending "to do" list! Last week I checked another Pinterest To Do off of my list: HOMEMADE PUFFY PAINT!! How rad does that sound?! I got the idea from the One Crafty Mumma blog. It is very easy, slightly messy, and boat loads of fun! Her recipe calls for self-rising flour, but if you are like me (and most people, I think) you don't have that.  You have All Purpose flour.  So... I will post the ingredients I used and it worked beautifully.

Supplies needed: 
Flour
Salt
Baking powder
Food coloring
Water
Small bowls
Q-tips (or paintbrushes)
Sheets of thin carboard, cardstock, or thick art paper (the thicker, the better for this project)
Newspaper or something to cover your work area (I use a plastic table cloth from the Dollar Tree)

For each bowl you will add:
1 Tbsp flour
1 Tbsp salt
1 tsp baking powder
a few drops of food coloring (depending on how bright or dark as you want it)
4 tsp water (approximately- add until you have a spreadable paste)

To Do:
Mix each color. Pass out the cardstock (or whatever you are using) and Q-tips. Get to work unleashing your creativity! When done, pop your masterpiece into the microwave for 20-30 seconds (start at 20 and see how dry it is). You want it to dry the paint out and puff it up.. but don't want it to burn.

Here is our journey through the puffy paint experience. I included the first few pictures just so you could see what I'm working with when it comes to photographing a 17 month old boy and a 3 year old girl (who loves having her picture taken!)... Good stuff, I tell ya!


Okay, here is my Pampered Chef plug: If you don't have one of these mini-whisk things, you NEED one! Talk about a versatile little tool! It worked like a charm for mixing up this stuff, but it also is amazing for whisking up gravy (no lumps!), getting all those dry clumps out of hot chocolate (I think I just perspired writing that as it is 100+ outside.. again..), and even for scrambling eggs!

The blue bowl is already mixed, green is in process, and yellow is up next.

Here are my little artists hard at work!


Here they are, before puffing.

And again with the Benjamin expressions.

What the frig?


Cook, cook, cook, puff, puff, puff.

Well hot dog! Lookie there! Can you see the puffy greatness?

Before & After

I got in on the action! I couldn't help myself! :)

It's pufftastic!


Minimal mess and destruction!

Brooke gave her seal of approval and asked if we could "do this art project togain (again) soon!" How can I say no to that adorable face?!

Tuesday, June 21, 2011

If you are going to make a mess, MAKE a mess!


I'm all about the "go big, or go home" mentality and that sure was exemplified in today's project with the kiddos! A little backstory- a year ago.. last summer, I made some handprints with Brooke and since Benjamin was only about 5 months old, I did some footprints with him (uber challenging, let me just say). Here is the link to the original post from last summer. Looking back at it, I now realize that I've lost some of the footprints! Must find those!! I had planned on purchasing wooden squares and making a wall hanging with them, but I never found them on sale (sale enough, anyway) and well, life got in the way! A few weeks ago I found the prints and was reminded that I needed to finish this project in some way. Then, when I was in the garage a couple of days ago, I spotted a scrap piece of lumber leftover from my patio furniture re-deaux that was the perfect size to use for a wall-hanging of these little suckers! Best of all, it was going to be free. So, instead of doing what most sane people would do (get out a roller, paint the board, and let it dry), I decided that since it is going to be a display of handprints OF the kids, that it should be painted BY them as well.

Ok, so the artsy person in me knows that the best paint to use would be some leftover wall paint. The logicial side knows that it would be easier to use the cute little craft bottles of paint. The friends of mine who don't do crazy painty stuff would probably have used a kid's paint. I scrounged around in the garage and found all of the random, funky colors I could find and set them all out, put down a drop cloth, found some brushes, and got out the paint trays. Let the insanity commence...

Here's all of the pretty colors I chose! Fun!

Before the excitement..

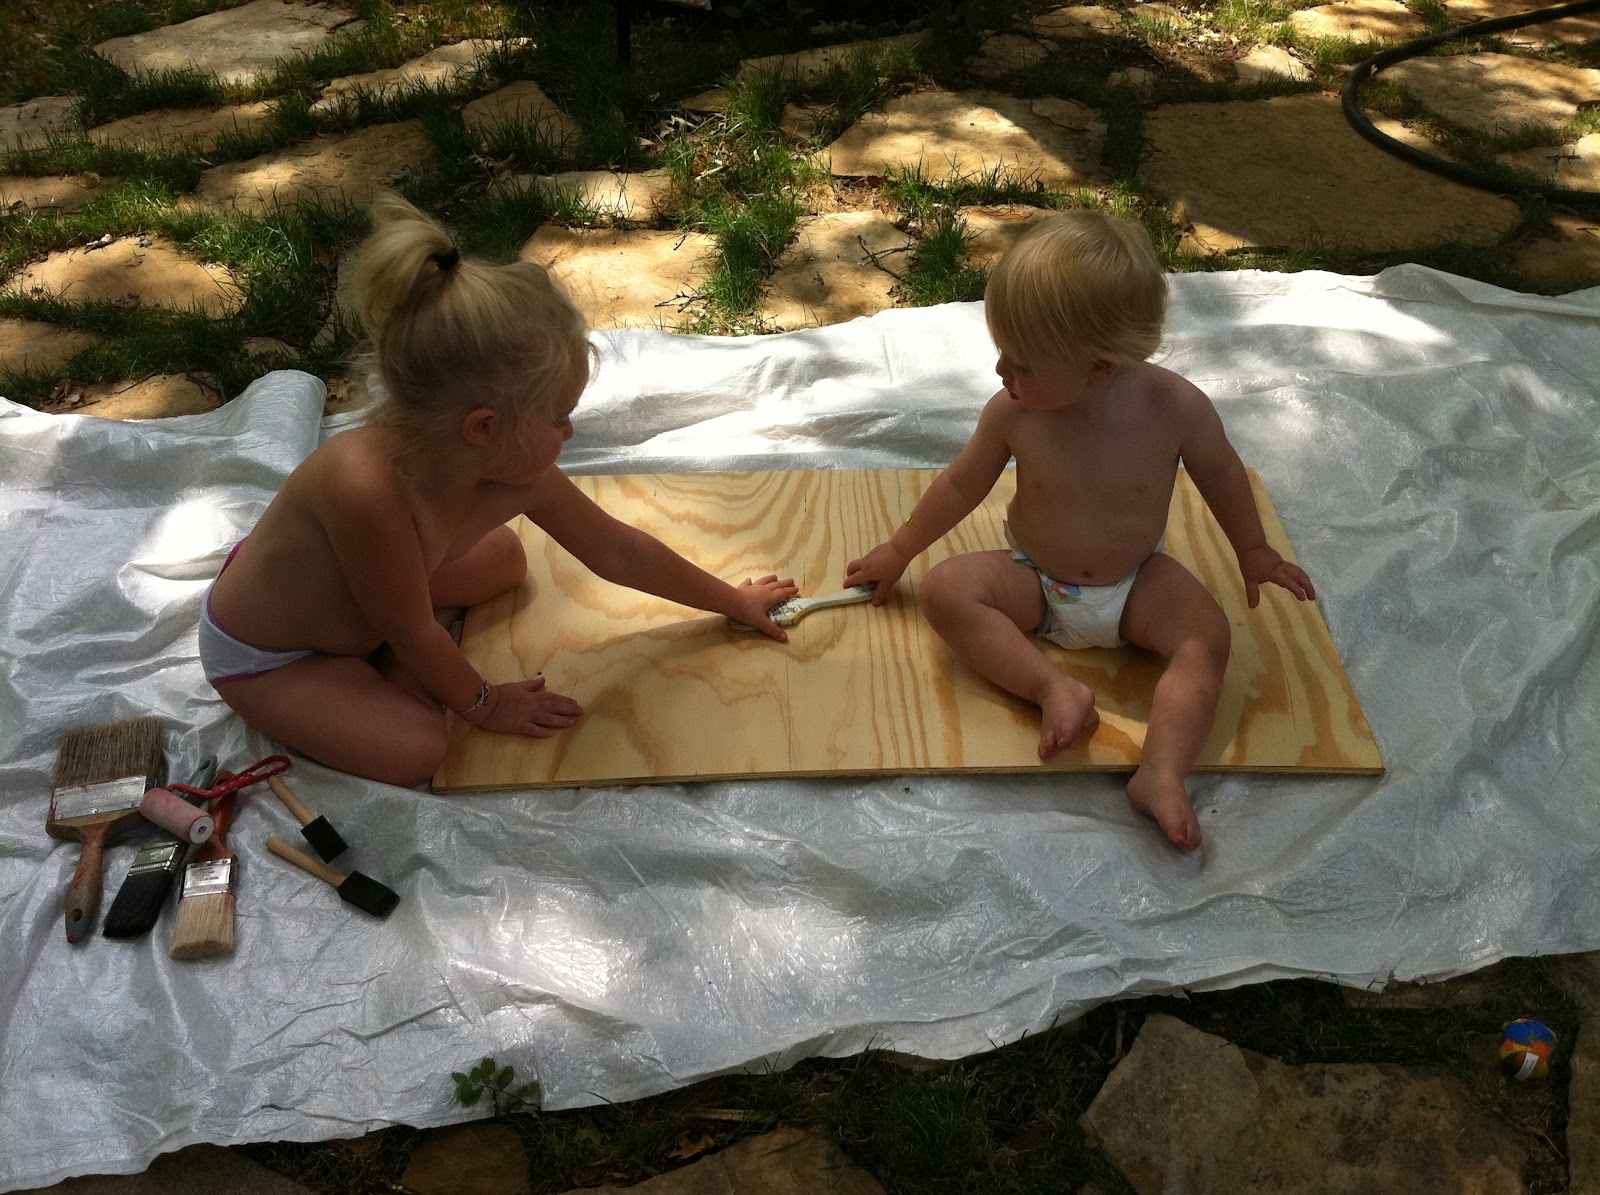
Starting to get warmed up... Benjamin HAD to sit on the board. The whole time. Seriously.

Brooke did a great job of painting and of not getting completely covered in paint. She also was very patient with me telling her "not to muddy up the paint", "to stop rubbing it all together because it was turning brown" (to which she replied, "but, I like brown, Mommy!", and covering up the missed spots.

Benjamin totally loved this and was very adept at getting himself completely covered!


Please notice Benjamin's backside. This is what happens when you are sitting on a board that you have painted all around you and you try to stand up and walk away. You slip and fall on your butt....

Watching them work together and "talk" (Brooke talked to Benjamin, he responded with gibberish and pointing) is truly priceless. They are best friends, except when they aren't. 

The finished masterpiece! It is PERFECT!!!

Benjamin was watching me hammer the lids down and begin stacking them up to put them away. It was SO cute that i got out my phone to video tape it.. 

For some reason, the INSTANT I started taping him, he decided that throwing the cans was a better, more fun, idea. Not so, not so! Please enjoy the events as they unfold..

Even with the two cans of spilled paint and my heart attack at the mess that caused, I managed to get everything all cleaned up.. including the kiddos! What a fun and special afternoon! We ended it with a little water table play time, popsicles, and shaving cream fun in the tub before baths! I love my kids!


Related Posts Plugin for WordPress, Blogger...