Showing posts with label puffy paint. Show all posts

Monday, August 8, 2011

Another puffy paint craft!

After seeing my homemade puffy paint post, my friend Jessica told me about another way to do a homemade puffy paint activity with the kiddos that she uses with her first graders. She said it was much easier than the one we did! So.. I had to try it! Tons of fun and yes, a little easier, and plenty messy!

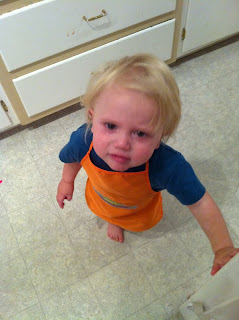
We did this right after nap time and SOMEONE woke up on the wrong side of the crib. I won't tell you who.. I'm pretty sure you can figure it out on your own!

Supplies needed:
Shaving Cream
Liquid glue
Food coloring
containers to mix the "paint" in (I used a metal muffin tin from the dollar store)
something to paint with (I used foam brushes)

1. Using a half and half mixture, squeeze some glue into each mixing container. One bottle of glue gave me a good amount of three different colors. Oh, and UNSCREW the lid of the glue and squeeze. Don't try to fill the container by squeezing the glue through the little pointy tip you unscrew. Not that I initially tried that. No way, not me.
2. Pick your colors and squeeze some drops into the glue. However much or little you want. The more coloring, the darker or more vibrant the color will be, obviously.
3. Use your brush and stir the glue and coloring together so that it incorporates well.

 4. Add a big 'ole dollop of shaving cream, roughly the same amount as your glue. Although really how does one measure such a thing? Glue is a dense liquid and then the shaving cream is a puff of fluff. I really don't think this matters much. Squirt away! :)

5. Use your brush and mix, mix, mix.I scooped half of it out and put it in another container so it was more manageable.

6. Mix up the other colors the same way.

I love the smell of shaving cream. I also love that it reminds me of Reddi Whip. Reddi Whip pretty much makes the world go 'round. I want some Reddi Whip.

Clue #1.
 
Well, at least she is quite excited to get started!!

This looks cool. All tie dyed looking and stuff.

Ready. Set. GO!


I have made super cute aprons for both kids, and they wear them for cooking/baking with me... but I don't want them to get ruined, so I picked up these cheapies from the dollar store as well! 


I mixed red and blue (on the left) to get a purple....ish color. Yellow and blue on the right gave me green.. duh! I just wanted to see how it looked! 

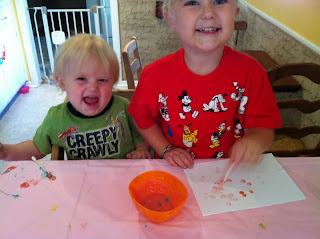
Brooke's masterpiece!

 Clue #2.

I LOVE this!

Mr. Ben is quite the little artist!


This was a total hit! Another keeper art project! You can do this with plain white glue and shaving cream, with no coloring added on black or blue paper for snow men and snow in the winter! :)

You will need to set your papers aside to dry for a full 24 hours. The next day they look pretty much the same - they are puffy, but dry! :)

Saturday, July 23, 2011

Homemade Puffy Paint fun!!

I'd like to formally thank Pinterest for helping me keep me busy, keep my kids happy, and for adding to my never-ending "to do" list! Last week I checked another Pinterest To Do off of my list: HOMEMADE PUFFY PAINT!! How rad does that sound?! I got the idea from the One Crafty Mumma blog. It is very easy, slightly messy, and boat loads of fun! Her recipe calls for self-rising flour, but if you are like me (and most people, I think) you don't have that.  You have All Purpose flour.  So... I will post the ingredients I used and it worked beautifully.

Supplies needed: 
Flour
Salt
Baking powder
Food coloring
Water
Small bowls
Q-tips (or paintbrushes)
Sheets of thin carboard, cardstock, or thick art paper (the thicker, the better for this project)
Newspaper or something to cover your work area (I use a plastic table cloth from the Dollar Tree)

For each bowl you will add:
1 Tbsp flour
1 Tbsp salt
1 tsp baking powder
a few drops of food coloring (depending on how bright or dark as you want it)
4 tsp water (approximately- add until you have a spreadable paste)

To Do:
Mix each color. Pass out the cardstock (or whatever you are using) and Q-tips. Get to work unleashing your creativity! When done, pop your masterpiece into the microwave for 20-30 seconds (start at 20 and see how dry it is). You want it to dry the paint out and puff it up.. but don't want it to burn.

Here is our journey through the puffy paint experience. I included the first few pictures just so you could see what I'm working with when it comes to photographing a 17 month old boy and a 3 year old girl (who loves having her picture taken!)... Good stuff, I tell ya!


Okay, here is my Pampered Chef plug: If you don't have one of these mini-whisk things, you NEED one! Talk about a versatile little tool! It worked like a charm for mixing up this stuff, but it also is amazing for whisking up gravy (no lumps!), getting all those dry clumps out of hot chocolate (I think I just perspired writing that as it is 100+ outside.. again..), and even for scrambling eggs!

The blue bowl is already mixed, green is in process, and yellow is up next.

Here are my little artists hard at work!


Here they are, before puffing.

And again with the Benjamin expressions.

What the frig?


Cook, cook, cook, puff, puff, puff.

Well hot dog! Lookie there! Can you see the puffy greatness?

Before & After

I got in on the action! I couldn't help myself! :)

It's pufftastic!


Minimal mess and destruction!

Brooke gave her seal of approval and asked if we could "do this art project togain (again) soon!" How can I say no to that adorable face?!
Related Posts Plugin for WordPress, Blogger...