First, grab a pair of pants that fit your little one and some fabric you want to make into pants. Fold your pants in half with the crotch on one side and the outer seams on the other (crotch is to the left in this picture). You will need to fold your fabric over, making it a little bit wider than your existing pants. Do this twice (once for each leg). You want the fold on the straight side (long side) of the pants.
You will want to cut your fabric out, leaving about an extra 1 1/2" at the top for the waist, and an extra 1" the rest of the way around. You keep the long side flush with the fold. Once you cut, you will have two identical cuts, like the picture above.
Open them up and lay them down, right sides facing. Sew the crotch (the curved parts in the picture).
Open up and move the sewn crotch seam to the middle- now you will see the pant legs! :) Sew the pant leg seams, using a 1/2" seam allowance. I start from the crotch and go down one leg, then go back to the crotch and go down the other leg. To help prevent fraying, you should either serge the edges, use a zig-zag stitch, or use pinking shears.
Fold your cuff over once and press, and then again and press. Using the finished cuff as your guide, fold over the other pant leg and line them up so the length of the legs is the same. In this picture, the front cuff is folded over twice, the back one is folded over once.
Now they are matched up and ready to be sewn.
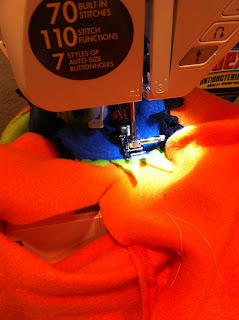
Make the waistband casing. Fold over the waist 1/2" and press. Then fold over about 1" and press again. Sew around the waist, leaving a 2" gap that will be used to insert the elastic.
I use a length of elastic that is slightly smaller than my child's waist. Pin it at one end and fish it through the casing. Sew the two ends together and tuck inside the waistband. Sew the 2" opening shut, turn your pants the right side out and you are done! :)
I started this project with the idea that I would make matching PJ pants for the kids. Well... unless Benjamin is related to Barbie.. his chunky butt and thighs will NOT be fitting in those! LOL!!! Looks like Brooke will have some matching pants for a doll or something!
My friend Carole sent me this WONDERFUL Ooga Boog knit!! I just LOVE this print! For these, I was sure to make them big enough for my boy! I also wanted to sew these with a French Seam. I'm a huge fan of the french seam. It so neatly encases all of the raw edges and looks so much nicer than a serged or zig-zagged edge! It's also easy-peasy! All you do is sew your seam wrong sides together, using 1/4" seam allowance.
Then you flip it, right sides facing, and sew again, using a larger 1/2" seam allowance (being sure the raw edges from your first seam are completely encased).
You can sort of see the raw edges all neatly encased in the French seam above. Easy, right?!
Now, since this is a knit and it's a little bit bulky w/ the encased edges, the seams at the crotch would have been too bulky if they overlapped where it meets the pant legs. So, to cut down on the bulk right there where they join, I just cut a notch out right at the corner on each side (front and back of the crotch). This will make more sense when you are making them, I promise.... err I hope.
I also pushed one seam to one side and one to the other. This worked out perfectly.
And there it is! The gorgeous French seams! *drool*.
I ran out of bobbin thread so I got out my handy-dandy Side Winder Bobbin winder and filled a couple.. or nine bobbins! I love that device and I love all of the purty colors of thread in my bobbins too!
This picture is just to show you that it is OK to piece elastic together if you are short a little! Just be sure to zig zag the heck out of it so it stays put! :)
You will never know once it's encased in the waist band!
Have I mentioned how much I LOVE this material and I think these pants are the cutest evah!
My final pair of pants for the day was inspired by this Kleenex box. I LOVED the monsters on it and knew I wanted to make some fleece Monster Butt pants. I started with this one-eyed Blue Monster guy.
I also have to mention here that sewing with fleece is SO easy!! No need to worry about encasing raw edges b/c there is NO fraying! Woot! Just one fold, sew down and done. You could seriously crank out a ton of fleece pants in no time! However, if you are making a monster butt, it will take a LOT longer!
For these, I sewed the crotch seam and then stopped. I did NOT sew the legs yet, b/c I knew I would need to be moving them all around when sewing on the applique.
I cut out all of the pieces and sewed them on to the main monster face first. This was tedious!
Then, I pinned it on to the pants and sewed it on.
I was glad I left the leg seams open (you can see here that it came in handy).
And done! I can't wait to see Ben in these monster pants crawling along! Too cute!


I love your blog. I think you should just sew stuff, blog and be a mommy...work is for the birds. ;) Either that or add more hours to the day so you can blog.
ReplyDeleteAww Shannon, thanks for the compliment!! I WISH I could just be a mommy, sew stuff, and blog about it all! *sigh*! I thought about you when writing this pants post. It isn't much of a tutorial for a beginner, more of a "halftorial" since I didn't take pics of EVERY step. Let me know if you want some links of tutorials that do this much better than I did, if you are serious about making some pants for your precious boys! Or, let me know if you want me to make some matching pants for them!
ReplyDelete