Ahem. I didn't realize that I never finished this post. Hahah! I had uploaded all of the pictures and then something must have come up and well.. here we are more than 3 months later! Oopsie!
So... back in early March I was planning Brooke's 3rd birthday party. She's totally not one of those kids who is obsessed with any one thing. She's an equal opportunity child and likes a variety of things, which I can totally appreciate. I may just gouge my eyes out if everything we had around here was Princesses, Dora, Minne Mouse, or the like. Although, now that I write that.. perhaps that is why we have SO much stuff- we have to have a little bit of everything! hahahaha....hmmm.....
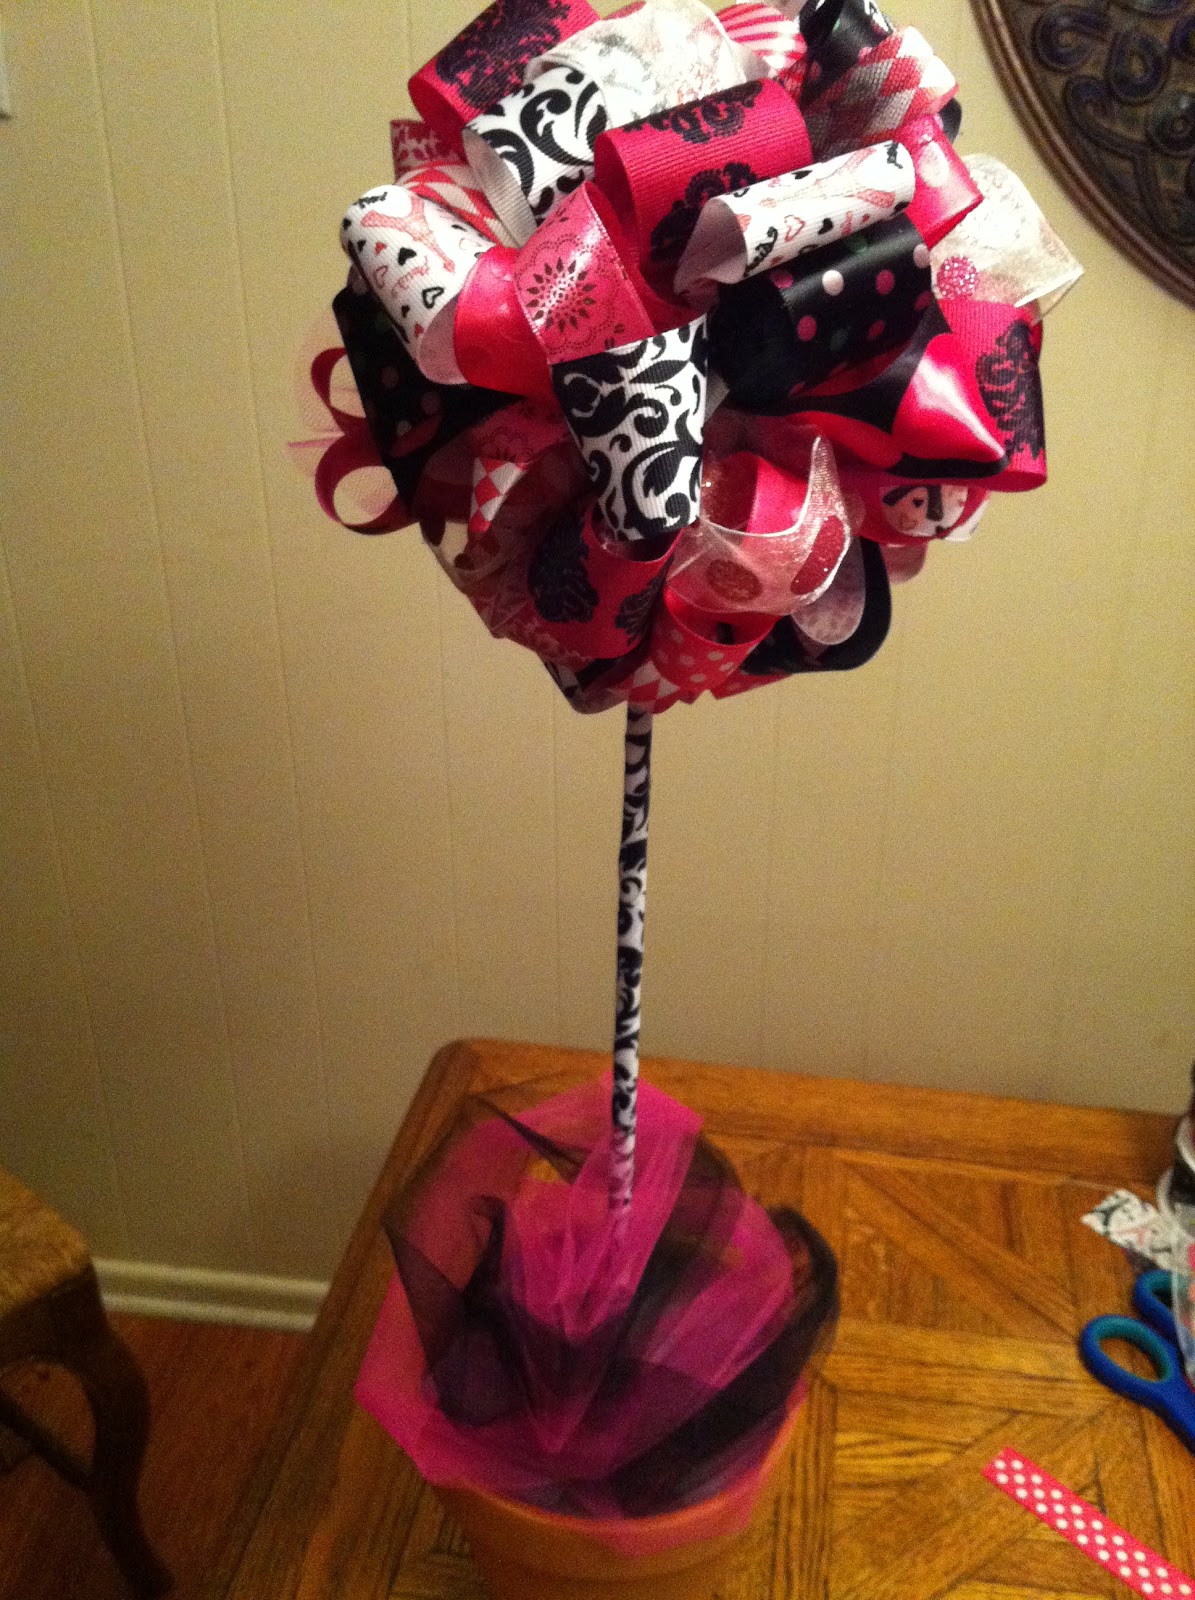
Okay, so the one show she does request to watch on a regular basis is Mickey Mouse Clubhouse. Since she's a girl, we went more with the Minne Mouse thing and since hot pink and zebra is sort of "in" right now, I picked that as our theme. I was browsing crafty blogs and Etsy as I tend to do and ran across some super duper cool Ribbon Topiaries! I HAD to make one for the party!! I asked my friend if she wanted to have a crafty day with me and she did (yay!), so we hit up Hobby Lobby when their ribbon was 1/2 off (I had PLENTY of ribbon already and needed NONE, but I love a good excuse to get more!!) and got the necessary supplies. I had forgotten the straight pins (an integral part of this project!), so I ran to the store. The GHETTO "$1" store. Side vent: I think that stores that contain the word Dollar or $1, should only sell items that cost a buck. Peeves me off when things aren't a dollar. My pins were more than a dollar, but oh well. They also appeared to have fallen off of a truck from Mexico and to have been used previously, put back in the plastic box and taped up. Again, oh well, I needed them and Kroger didn't have any so this was my only option.
Okay, so this isn't really a tutorial, but I'm pretty sure you can figure out how to make these little pretties!
You will need:
* STRAIGHT PINS FROM THE NON-GHETTO STORE (I tell you this for your own health- I was terrified of poking myself and then dying from a flesh eating disease)
* oodles and oodles of yummy ribbon! I say pick a color theme and go crazy with it!
* a wooden dowel rod
* a styrofoam craft ball
* that floral foamie stuff (you will cut it to fit into your pot and will poke your dowel into it on one end and the ball on the other end)
* something to cut the ribbon into the proper lengths (I used my rotary cutter and self healing mat to cut several pieces of ribbon at once- a huge time saver!)
* time (this was a huge time suck- much longer than I had anticipated!- in fact, I had every intention of making a pair of these, but ended up with only one! I'm not sure if Kelly ever finished hers actually!)
The quick and dirty instructions:
* Figure out how big of loops you want by making different sized loops in your hand and holding them up to your ball. Figure out how full you want it and then snip a length of ribbon and cut the rest of them to that size. I believe mine were all 5" (or were they 6"?).
* Roll out your ribbon and roll out another one on top, and another, and another.. then make one cut through the stack! You should be able to cut through 4 ribbons at once and go down the length of your ribbon.
* Cut LOTS of ribbon. More than you think. Then once you start, you will end up cutting more. Promise.
* Loop a length of ribbon and overlap the ends while placing it on the ball and pin it. Repeat. You will place these pretty close together so that you don't get any bald spots.
* I wrapped my dowel with ribbon and hot glued down the ends.
* To cover the green foam in the pot I just rolled up some tulle and placed it on top. Not the best, but it works and I haven't changed it.
* As I made more progress on the ball, I put it on the dowel and worked around it, but initially I just had the ball on the table and started on one side.
I *think* that is enough information for ya?!....
My supplies:

Some of my piles of ribbon.

Ribbon loops pinned on the ball. I had to fill in a lot. I ended up pinning the wider, fat ribbons and then filling in with the thinner ones all around them.


Kelly cutting ribbon w/ the rotary cutter. She thought it was fun!

Coming along nicely!

I ended up cutting up some tulle and poking it in there randomly. I liked it!

Done! Well, as done as it got! I'd like to paint the pot black and glue a band of ribbon around it!
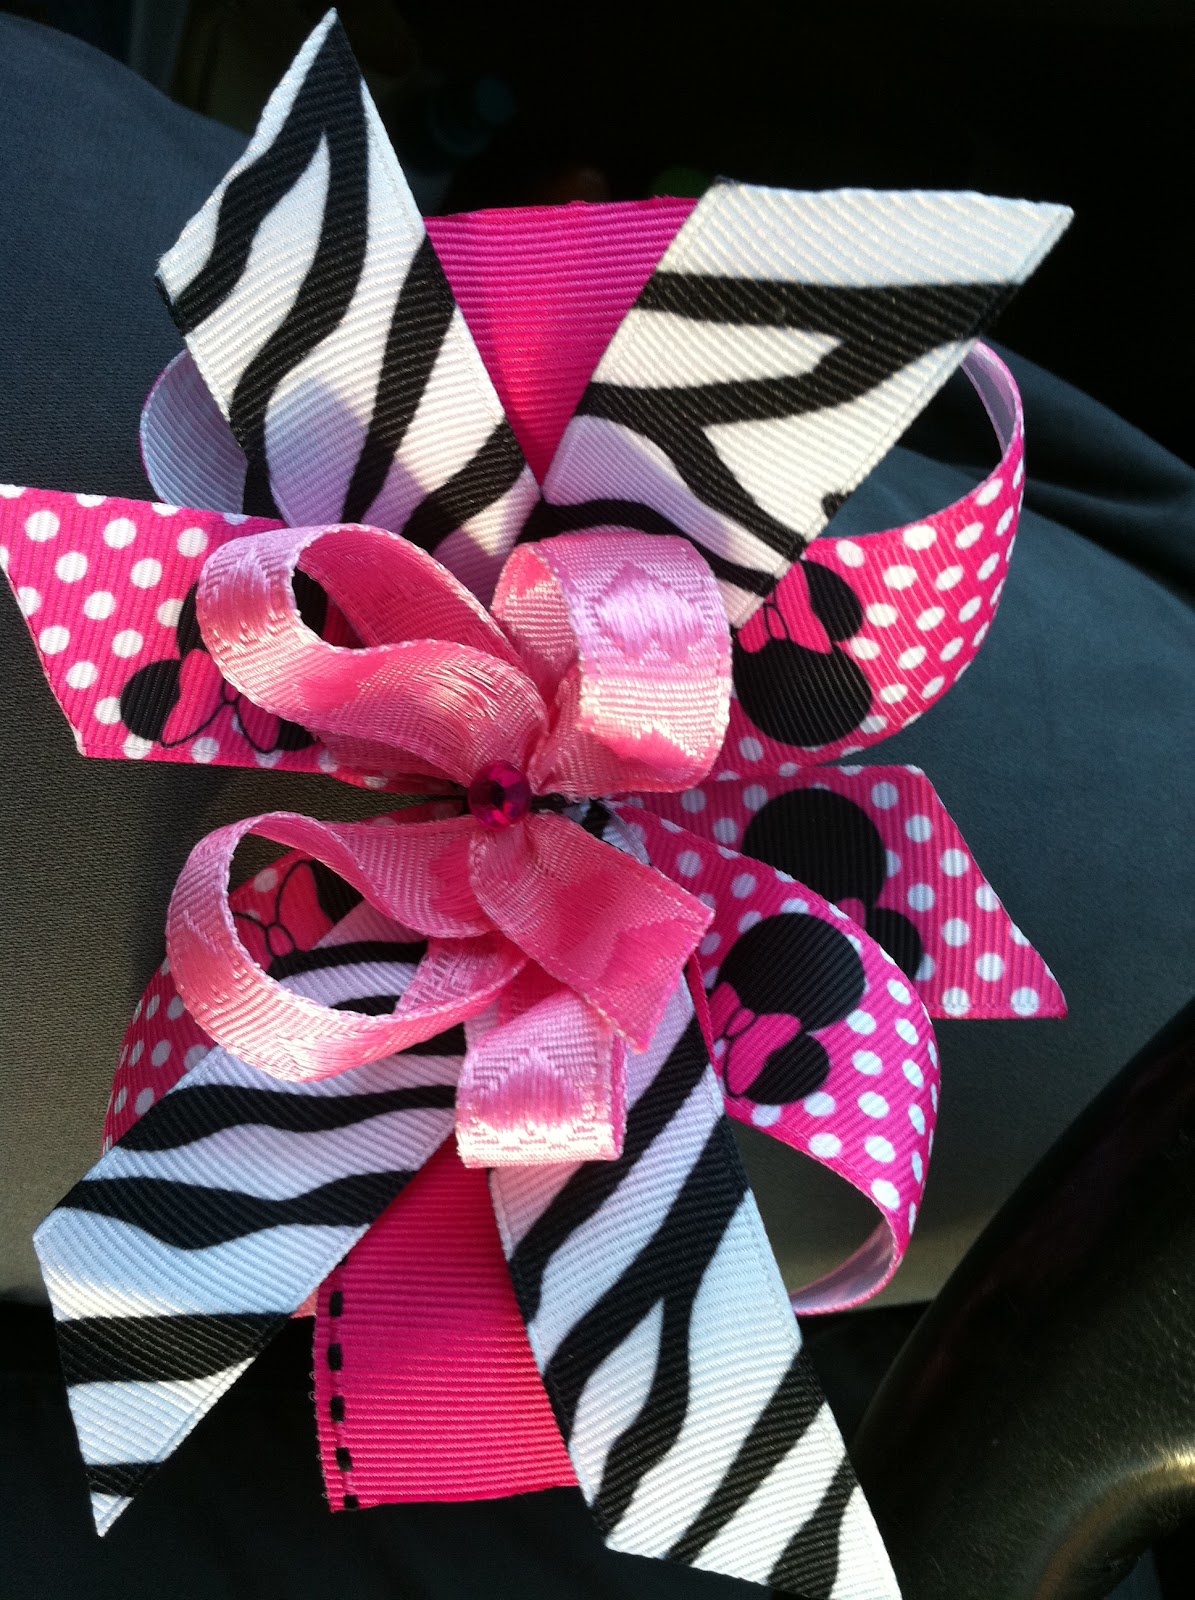
Brooke's hairbow that matched the topiary pretty well actually! (yes, this picture is sideways)
Brooke in her awesome dress (that also matched the topiary!).


Here are some pictures from her party!


The sight of this playroom made my blood pressure rise. Holy shit.

When I was little we always had pinatas at our parties! I was super excited to get one for Brooke. I was super IMPRESSED that now they have these cheater pinatas and all you have to do is pull a ribbon and it opens up the bottom! No bats and hits in the balls necessary!


Super cute! Definitely on my "to-do" list! I wish we had a Hobby Lobby close.
ReplyDeleteJenny
I wish you did too, if for no other reason that to pick up some ribbon on sale! That and tulle spools are pretty much the only things I go there for!
ReplyDelete