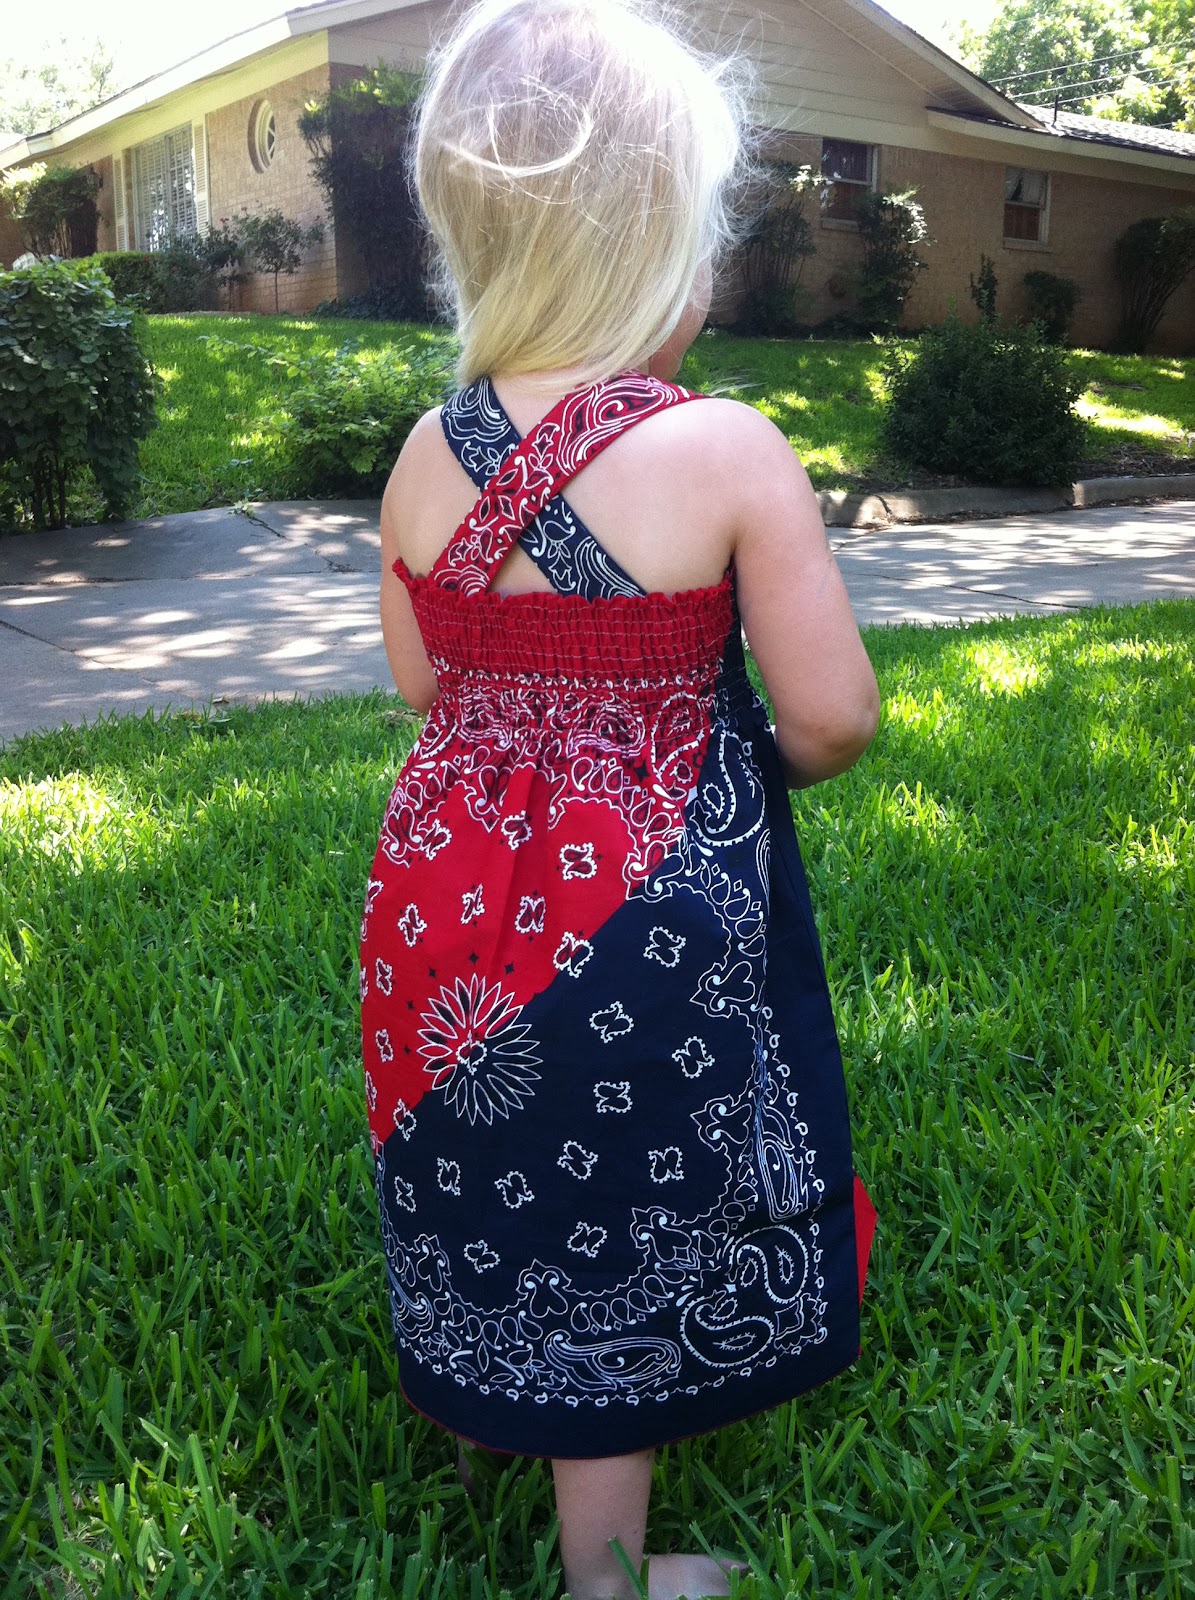
Every July we go to Indiana for the annual 4th of July Family Reunion and this year is no different. Last year we started a little tradition of making a week-long road trip out of it instead of flying. We had a great time and are very excited about this year's trip. We haven't yet figured out our route.. but we still have 10 days to plan it! Instead of planning how we will get there, where we will stay along the way, and what sights and things we will see- I have been doing more important things. I've been trying to plan out what Brooke (and Benjamin, if he's lucky) will wear! I've got to have at least two Red, White, & Blue outfits! I'm not into the $5 Old Navy t-shirts... so I had to take matters into my own hands and get crazy with the sewing machine! First up... a shirred bandanna dress! This was a really simple dress to make and only took me a little over an hour to make from start to finish. It also cost me less than $4.50! That is a win-win in my book!
I need to preface this by saying that I never was a fan of bandana dresses until now. I do not like the ones you see that have the ribbons as ties on the shoulders, much like the pillowcase dresses. To me they are just blah, boring. If you love them.. I'm not knocking you, they just aren't my thing! On to the tutorial! The dress I made is for my 3 year old who wears 3T and 4T in dresses. The elasticity of the bodice on this means that it can probably go up and down from there to a 2 (although you may need to shorten it) or even a 5. When the length of the dress is outgrown, it would be very cute as a top!
Gather your supplies:
3 bandanas
elastic thread
Thread your bobbin with the elastic thread and get to shirring! If you haven't used elastic thread before.. go read some tutorials, watch some videos, and if you have a Brother sewing machine- consider another dress to make! LOL. No, seriously. It was nearly the death of me trying to get my machine to shirr (on a different project)! Here are some links that may be helpful to you!
1.
http://grosgrainfabulous.blogspot.com/2010/08/shirring-with-your-brother.html (if you have a Brother, click this link and watch the video! It sure helped me! FYI- I ended up having to tighten the tension on my actual bobbin casing, as suggested in the video and instead of trying to tweak it back to the original tension for regular sewing, I just went ahead and left it and bought a new bobbin case that I will use for regular sewing projects! It's nice to be able to just switch out the casings and be done!).
2.
http://grosgrainfabulous.blogspot.com/2010/08/technique-tuesdays-shirring.html
3.
http://gigglesmum-creativeheart.blogspot.com/2009/10/shirring-problems-i-cracked-it.html
4.
http://www.youtube.com/watch?v=WckKmm1cPFs
Starting at the corner of one bandana, shirr 12 rows with the elastic thread in the bobbin and regular thread in the top. be sure to backstitch at the beginning and end of each row. I spaced these about 1/4" apart (I think?..)
Do the same with another bandana.
When done shirring both bandanas, place them right sides together and sew down the sides, using 1/4" seam allowance. As you can see here, a nice bonus of sewing with bandanas is that the edges are already hemmed! :)
After the sides are sewn up, trim all of excess threads.
Next you will make your straps. I cut 2 strips from my third bandana. They were 4" x 21" (which is the width of the bandana). Depending on how you want your final straps to be and how you want the dress to be finished, you may or may not need that length. Go ahead and make them 21" and you can trim them down after you fit it on your child.
Fold the straps over, longways and press. Sew one end and then up the length. Turn the tube and press. If you don't have a little handy tool that helps you turn tubes of fabric, you must get one! It makes the process so easy and fun! You just insert the blue tube into your fabric tube then use the wooden dowel and push the fabric up through the tube that is inside.
You will end up pushing the blue tube out of the fabric tube and the wooden dowel will be inside. Use the dowel to push out your corners, then remove the dowel from the fabric tube and press.
Yay for the red, white, and blue bandana being made in the good 'ole U S of A!
The tubes before they were pressed.
Place the straps 2" inside of each of the side seams and sew down, following the same lines you used for shirring to camouflage your stitches.
Now, if you want to have a halter-type style of dress then you are done! You can tie the straps in a knot or a bow around the neck and it would look something like this:
Or... you can criss cross them and sew them down (fit it to your child before sewing down).
The back of the dress. I love how the front and back came together!
Brooke LOVED it and had to wear it the rest of the day!!
I wasn't sure which way I wanted to finish the dress, so I tried it on her each way.
I decided to go with the crisscross straps!
I HAD to make a matching hair clippie! I used an alligator clip, ribbon to cover it, felt, tulle, hot glue, and the excess fabric that I cut off of the straps when I sewed them down.
1. Cover the clip with ribbon using hot glue.
2. Laugh at your 3 year old who fell into a diaper box that she didn't realize was empty.... Bwahaha!
3. Hot glue two felt "leaves" together. Tie two small pieces of coordinating tulle together in the middle and glue them down on top of the felt.
4. Glue your fabric pinwheel flower down on top. To make this, all I did was twist up fabric and used a needle and thread to run through it periodically to hold it all together. I may or may not have broken a needle and poked the hell out of my hands a time or twelve. Pushing that needle through the thick bandana fabric was um.. fun.
5. Clip it in your lovely's hair and admire how stinking CUTE she is!!
I love this picture. It shows off the dress and hair clippie, but also makes me giggle because I can hear her ask me, "Mommy, do I need to smile for this one or not?". I told her she didn't have to, so she gave me this look! I *heart* my Brookie!!
You can definitely do this with any color or variety of bandanas! Have fun!